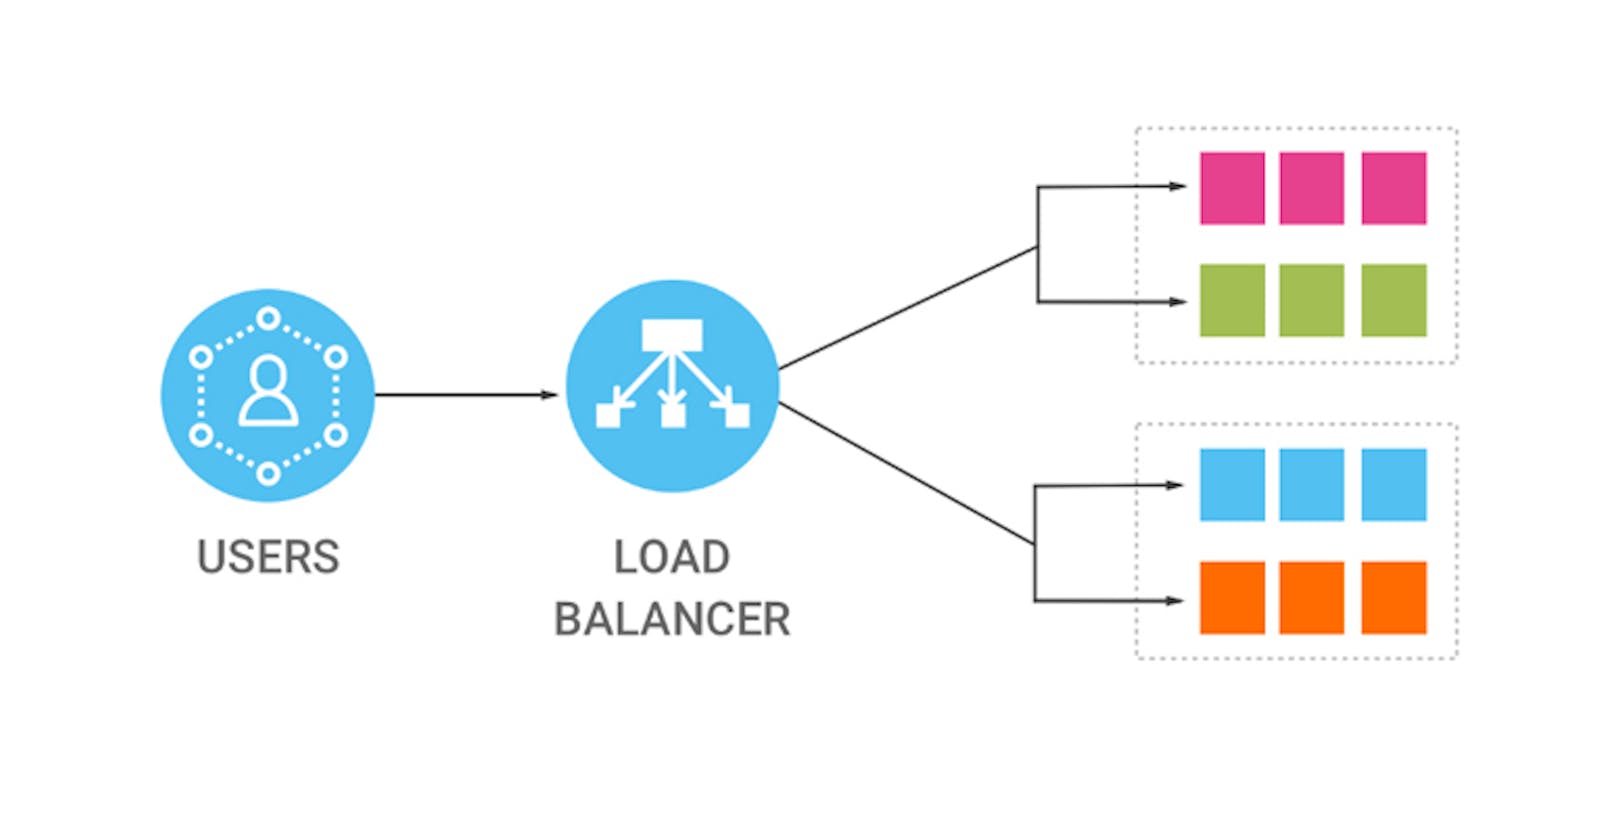


A load balancer is a networking component or service that distributes incoming network traffic across multiple servers to ensure efficient resource utilization and high availability for applications or services. It acts as a mediator between clients and servers, evenly distributing the workload to prevent any single server from becoming overwhelmed. Load balancers are essential in modern web architectures to handle increased traffic, improve performance, and provide fault tolerance.

In AWS (Amazon Web Services), there are three types of load balancers:
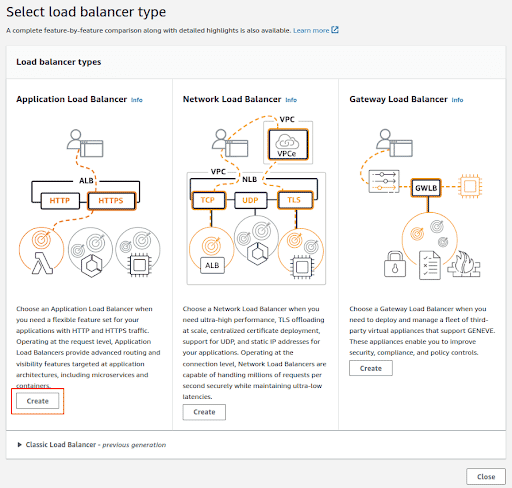
Application Load Balancer (ALB): ALB operates at the application layer (Layer 7) of the OSI model and intelligently distributes traffic based on the content of the request. It supports advanced routing features, such as path-based routing, host-based routing, and support for multiple domains. ALB is suitable for applications that require flexible and fine-grained traffic management.
Network Load Balancer (NLB): NLB works at the transport layer (Layer 4) and provides ultra-high performance for TCP and UDP traffic. It is capable of handling millions of requests per second while maintaining low latency. NLB is ideal for use cases that require extreme performance, such as gaming applications, real-time streaming, and IoT (Internet of Things) applications.
Gateway Load Balancer (CLB): The Gateway Load Balancer (GWLB) is a service provided by Amazon Web Services (AWS) that allows you to deploy and manage third-party virtual appliances in your virtual private cloud (VPC) infrastructure. It acts as a central point of control for inbound and outbound traffic, enabling you to scale, secure, and monitor the flow of network traffic between your VPC and external resources.
Each type of load balancer in AWS has its own strengths and is suited for specific use cases. By leveraging load balancers, you can enhance the availability, scalability, and performance of your applications or services in the AWS cloud.
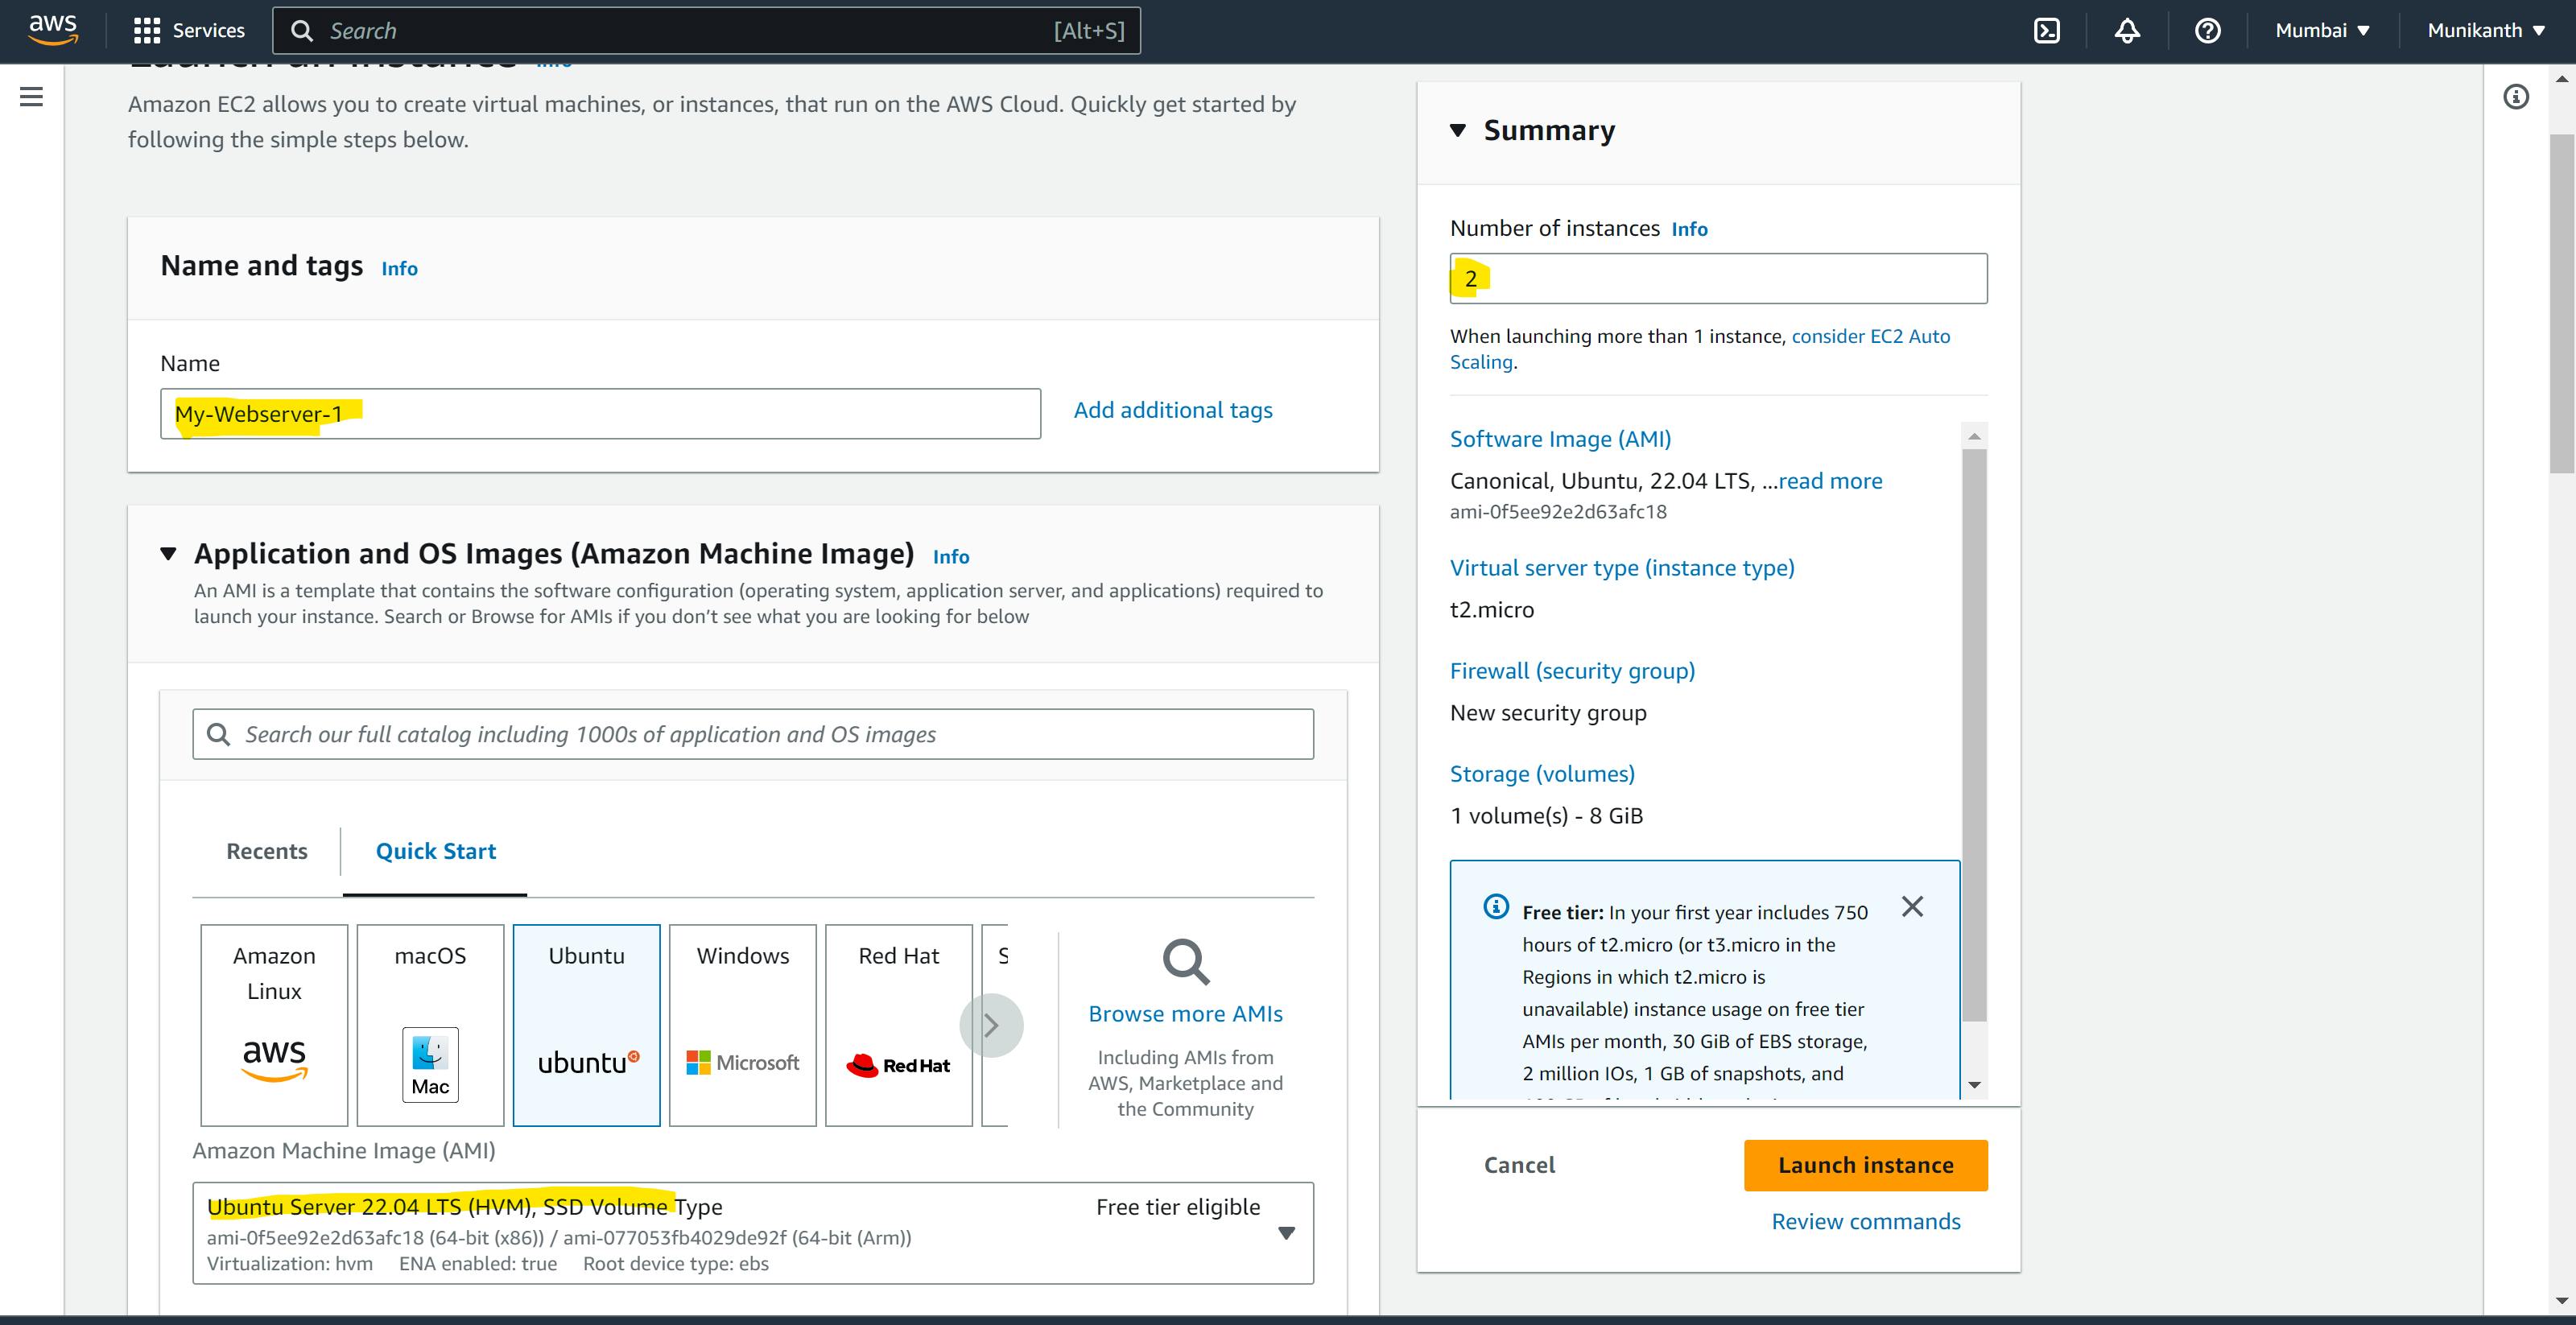
Step 1: Create an aws EC2 instance using the AWS EC2 service in the AWS console. create at least 2 instances for practice purposes.
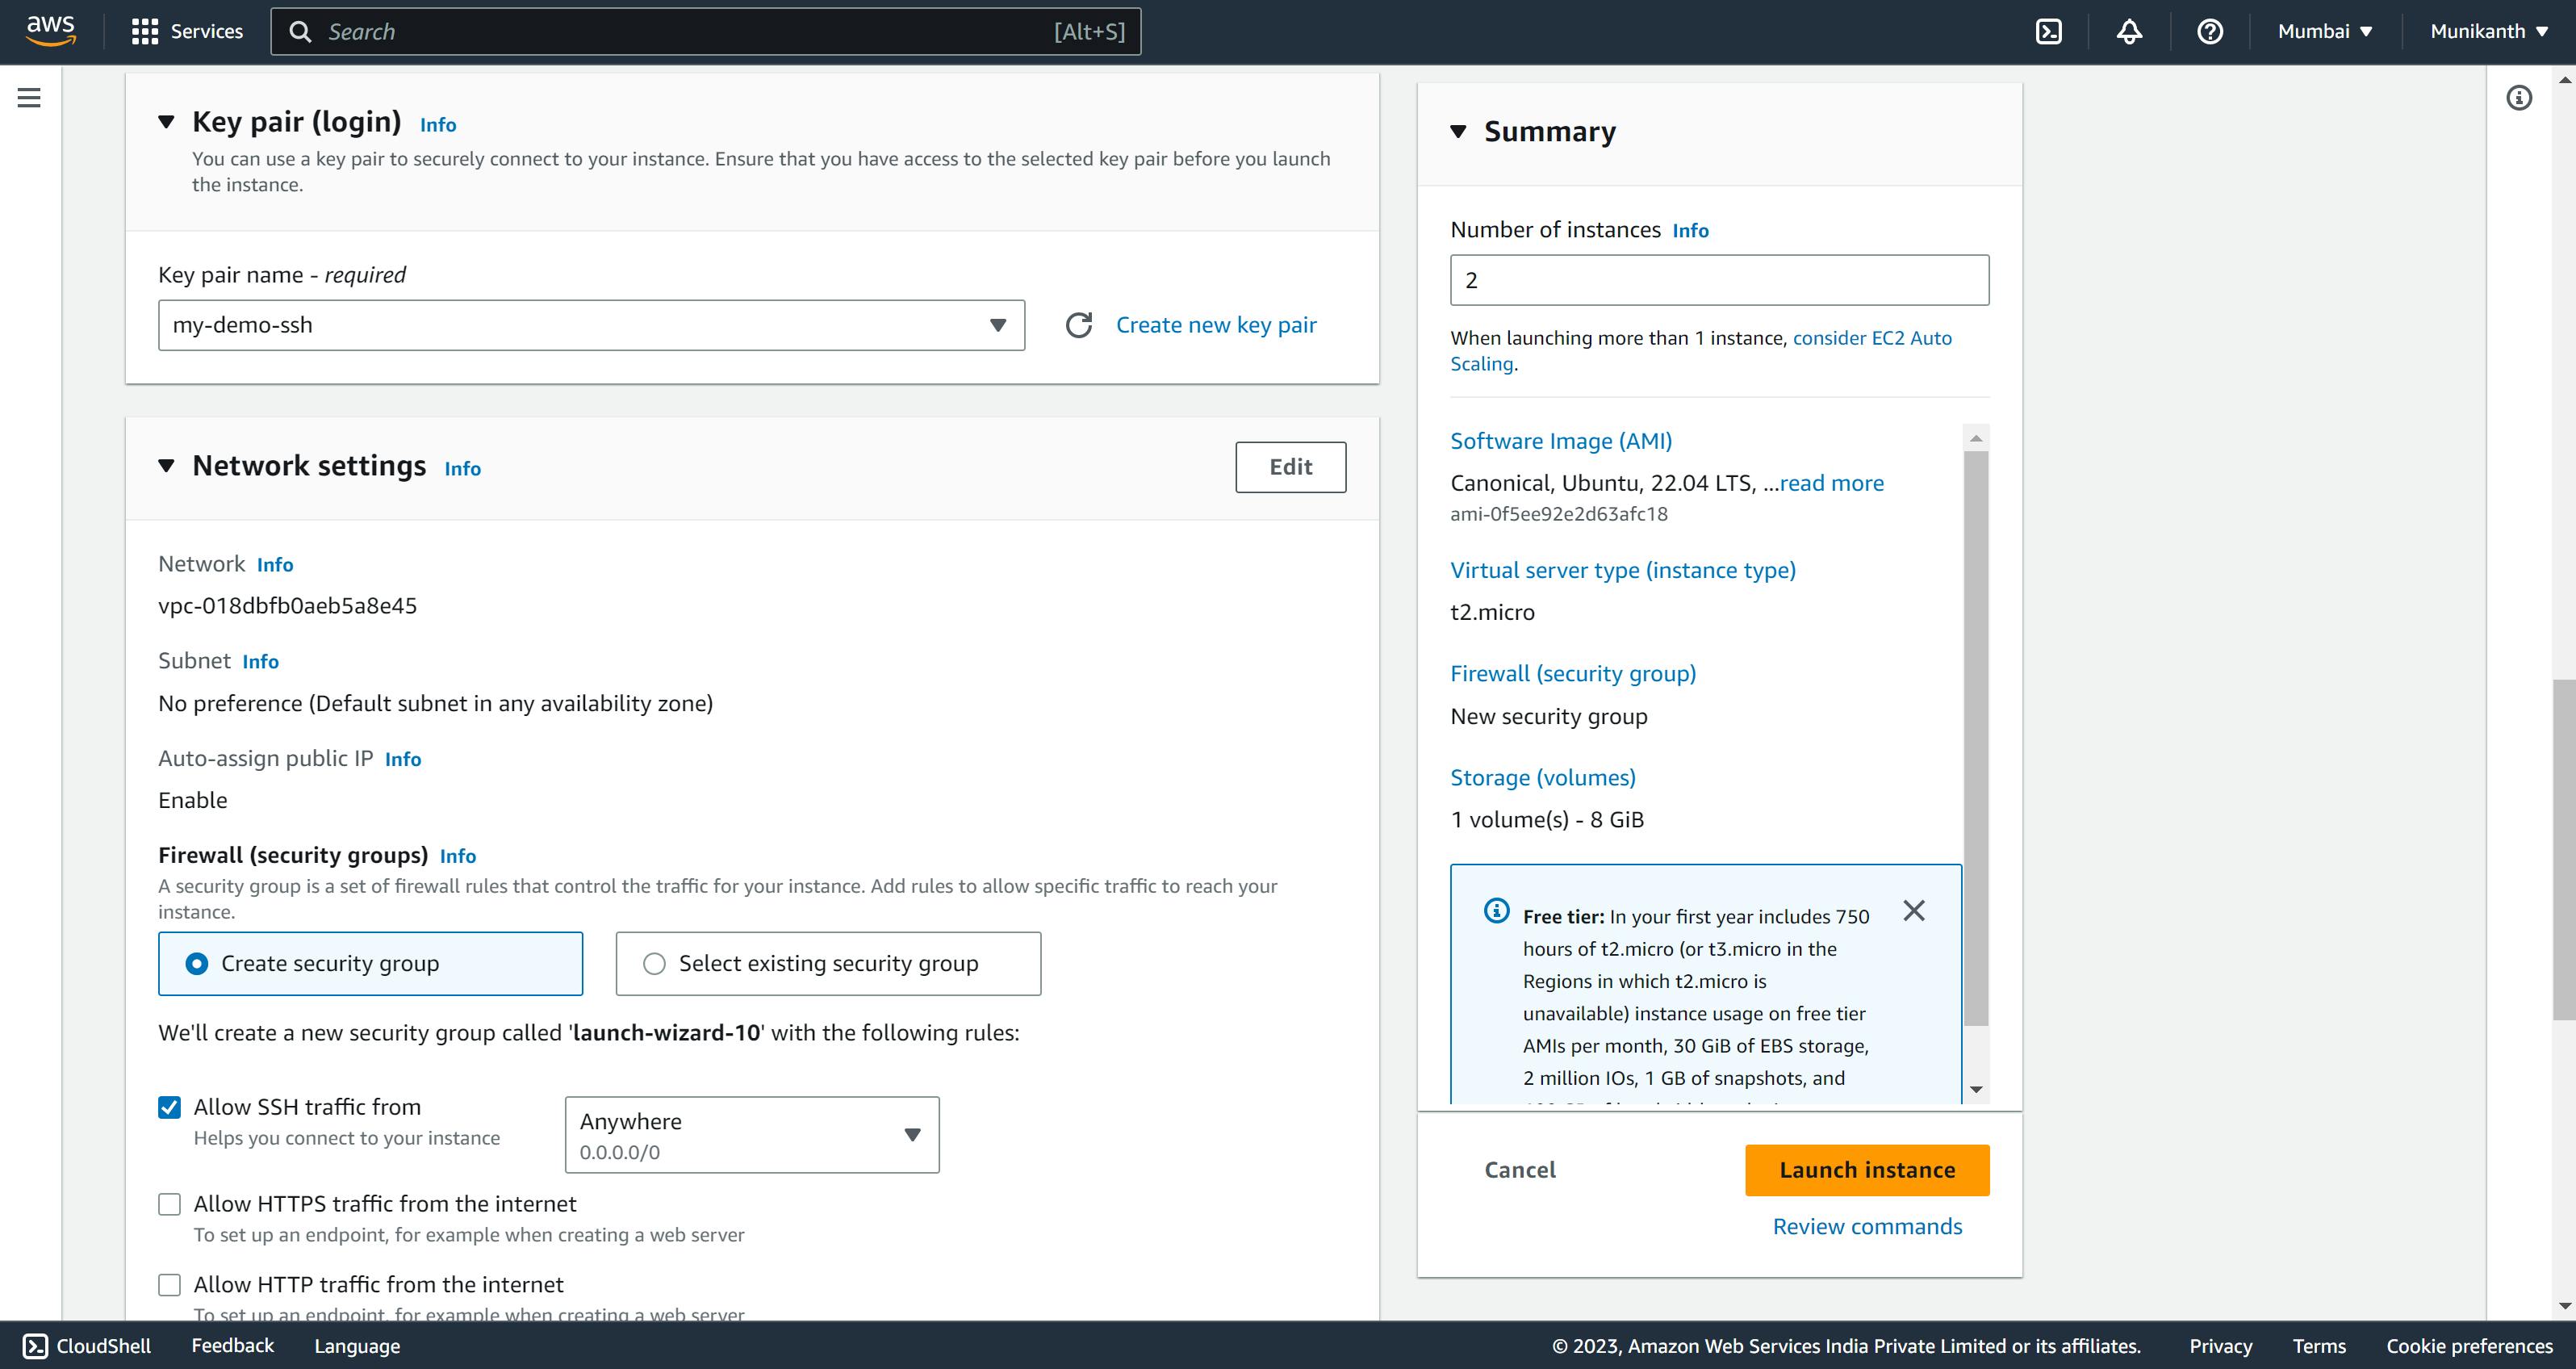
Step2: Create a key-pair for your instances or select an existing key-pair & update necessary VPC configuration & Security groups as with required ports
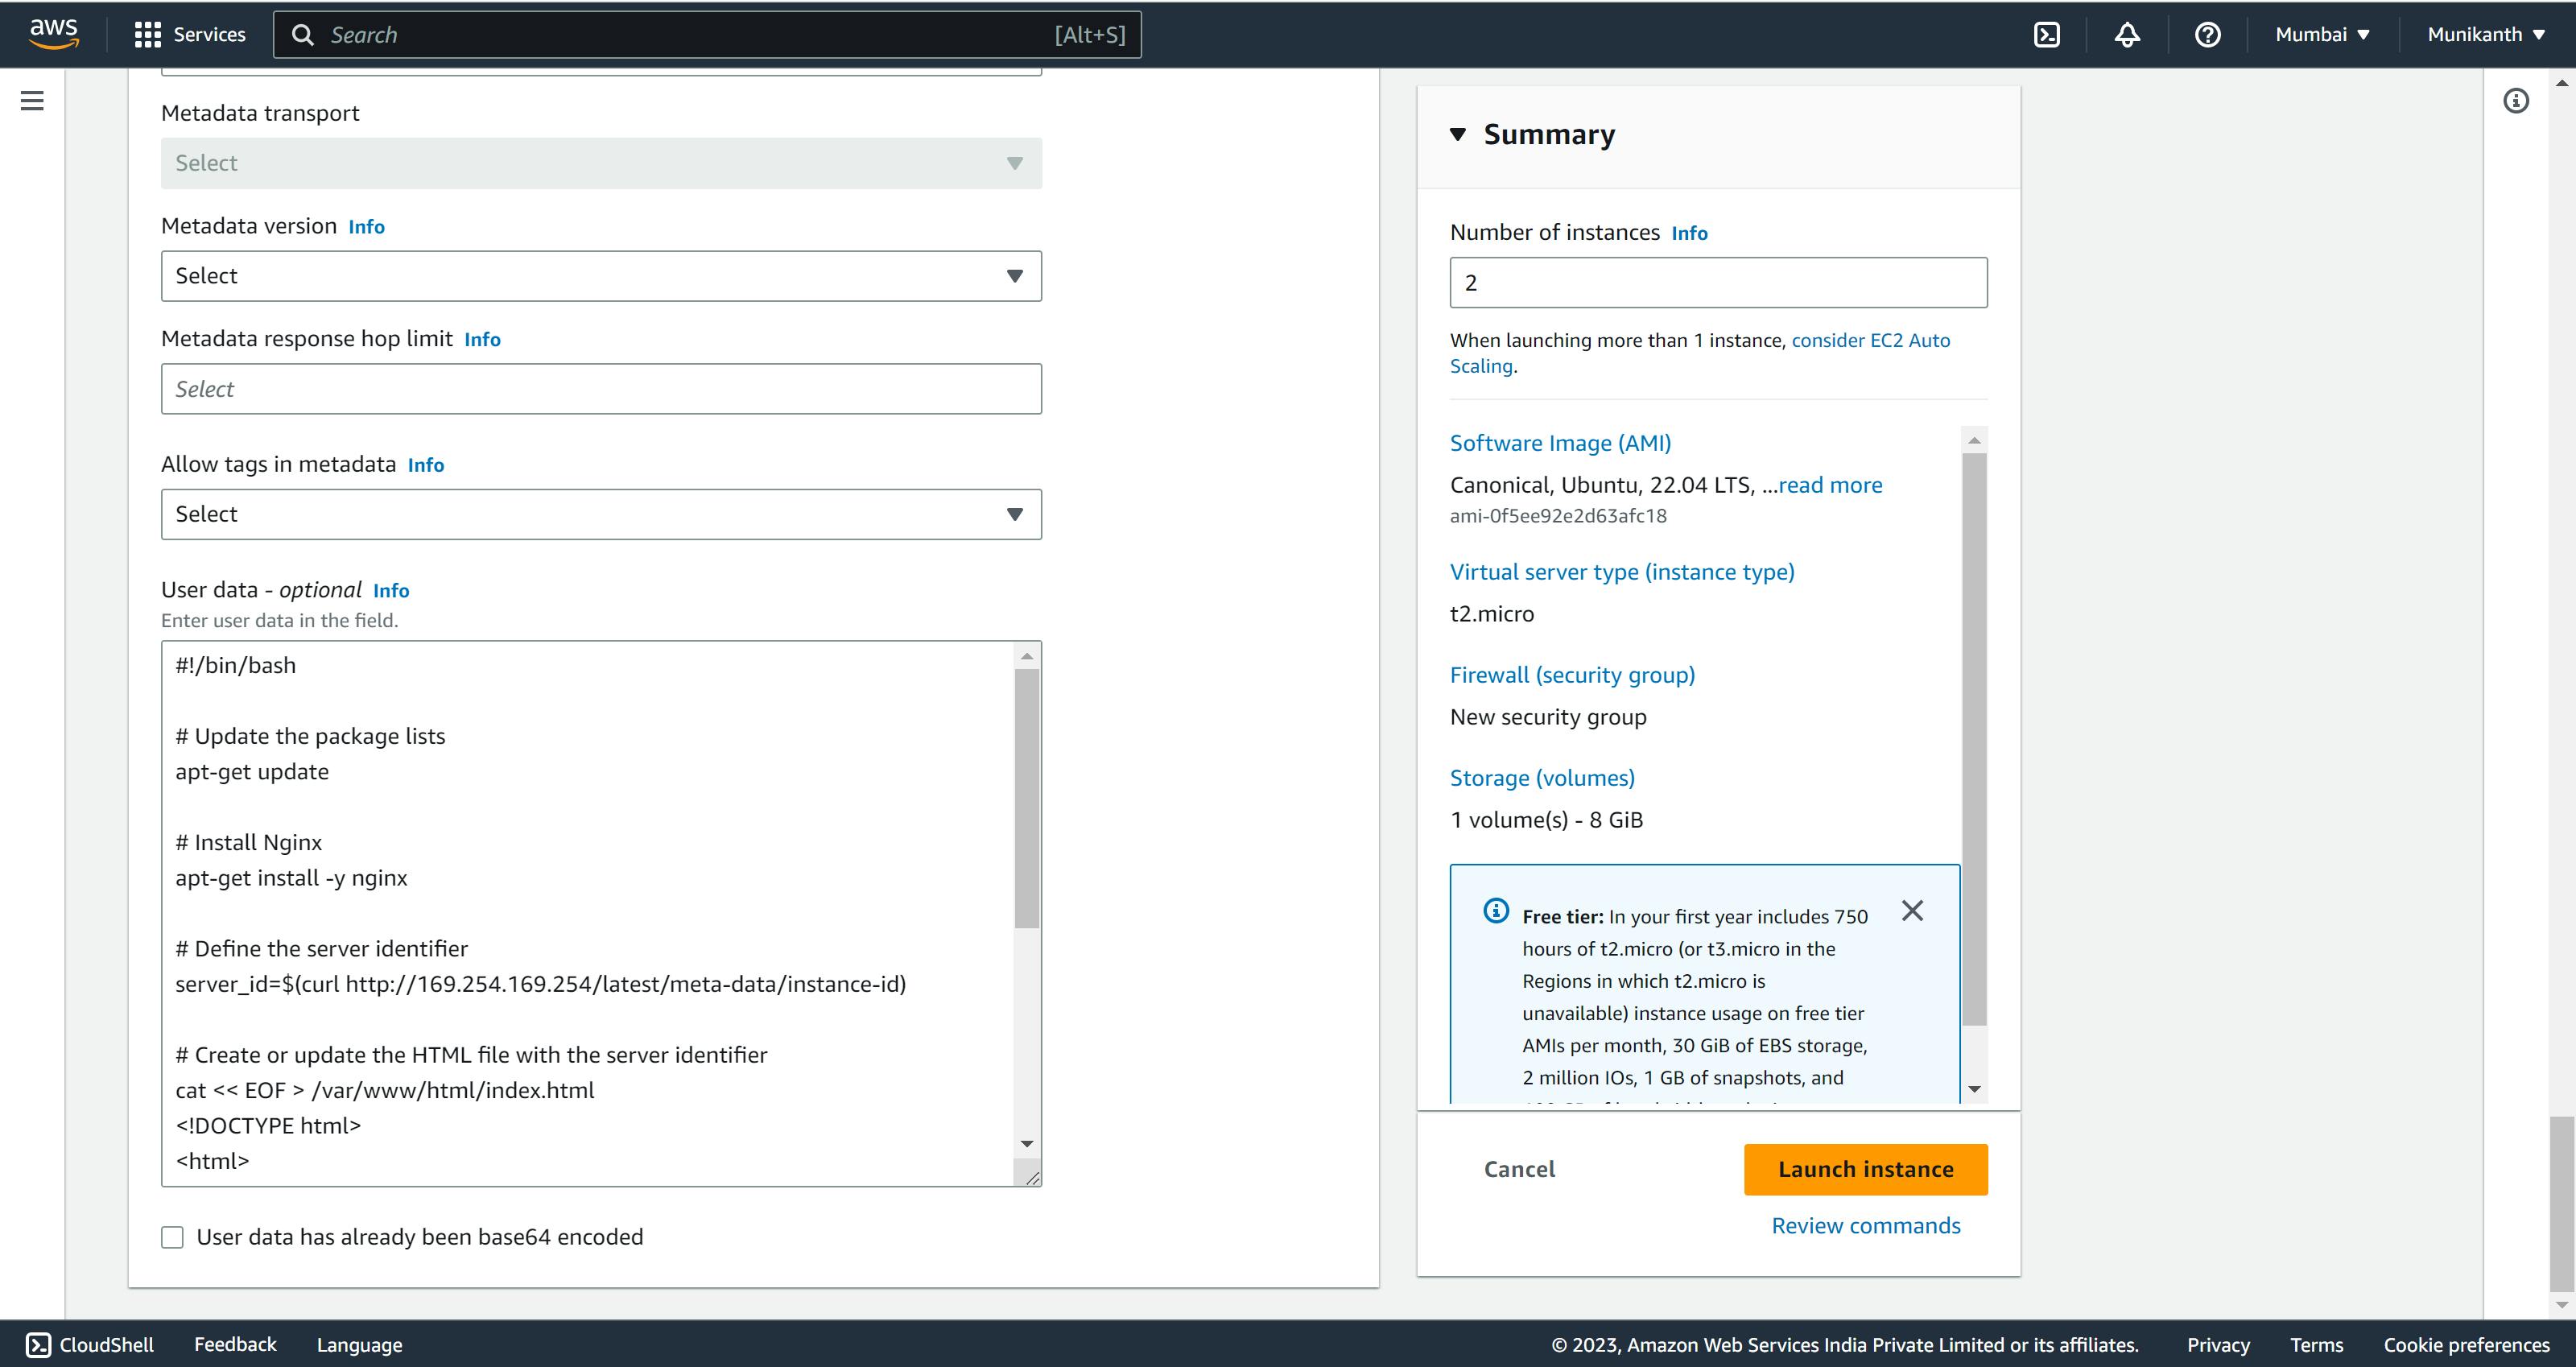
Step 3: Navigate to the Advance setting under this user data block section and update c the code for installing nginx & update the index.html & launch the instance
#!/bin/bash

# Update the package lists
apt-get update

# Install Nginx
apt-get install -y nginx

# Define the server identifier
server_id=$(curl http://169.254.169.254/latest/meta-data/instance-id)

# Create or update the HTML file with the server identifier
cat << EOF > /var/www/html/index.html
<!DOCTYPE html>
<html>
<head>
    <title>Nginx Server</title>
</head>
<body>
    <h1>This is server $server_id</h1>
</body>
</html>
EOF

# Restart Nginx service to apply the changes
service nginx restart
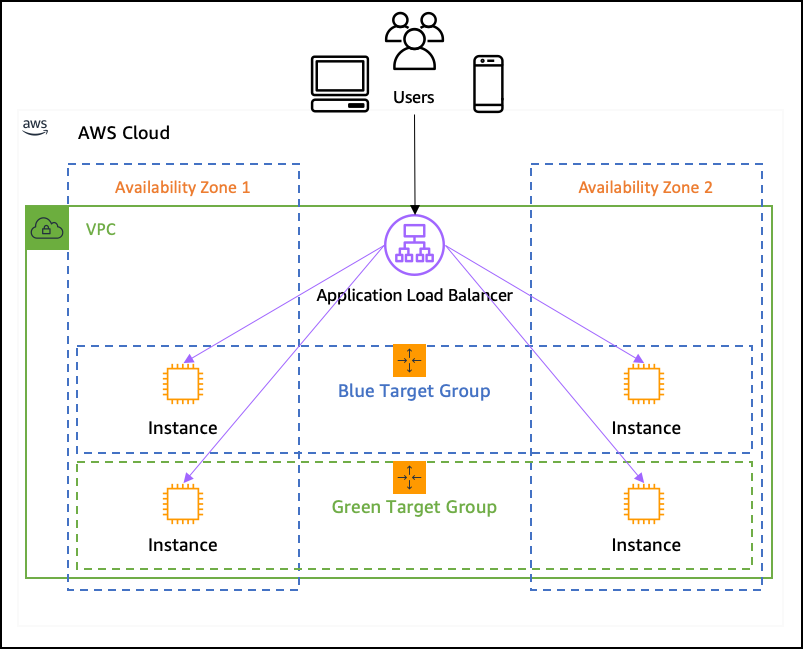
Target groups are a key component of the AWS Elastic Load Balancing service. They are logical groups of resources, such as EC2 instances or containers, that receive incoming traffic from a load balancer. The load balancer distributes requests to the resources within the target group based on configurable routing rules. Target groups enable you to balance the load across multiple resources, improve the availability and fault tolerance of your applications, and easily manage traffic routing. They also provide health checks to monitor the health and status of the registered resources, automatically removing unhealthy resources from the load-balancing rotation. Target groups work in conjunction with load balancers, allowing you to effectively distribute traffic and scale your applications in the AWS cloud environment.
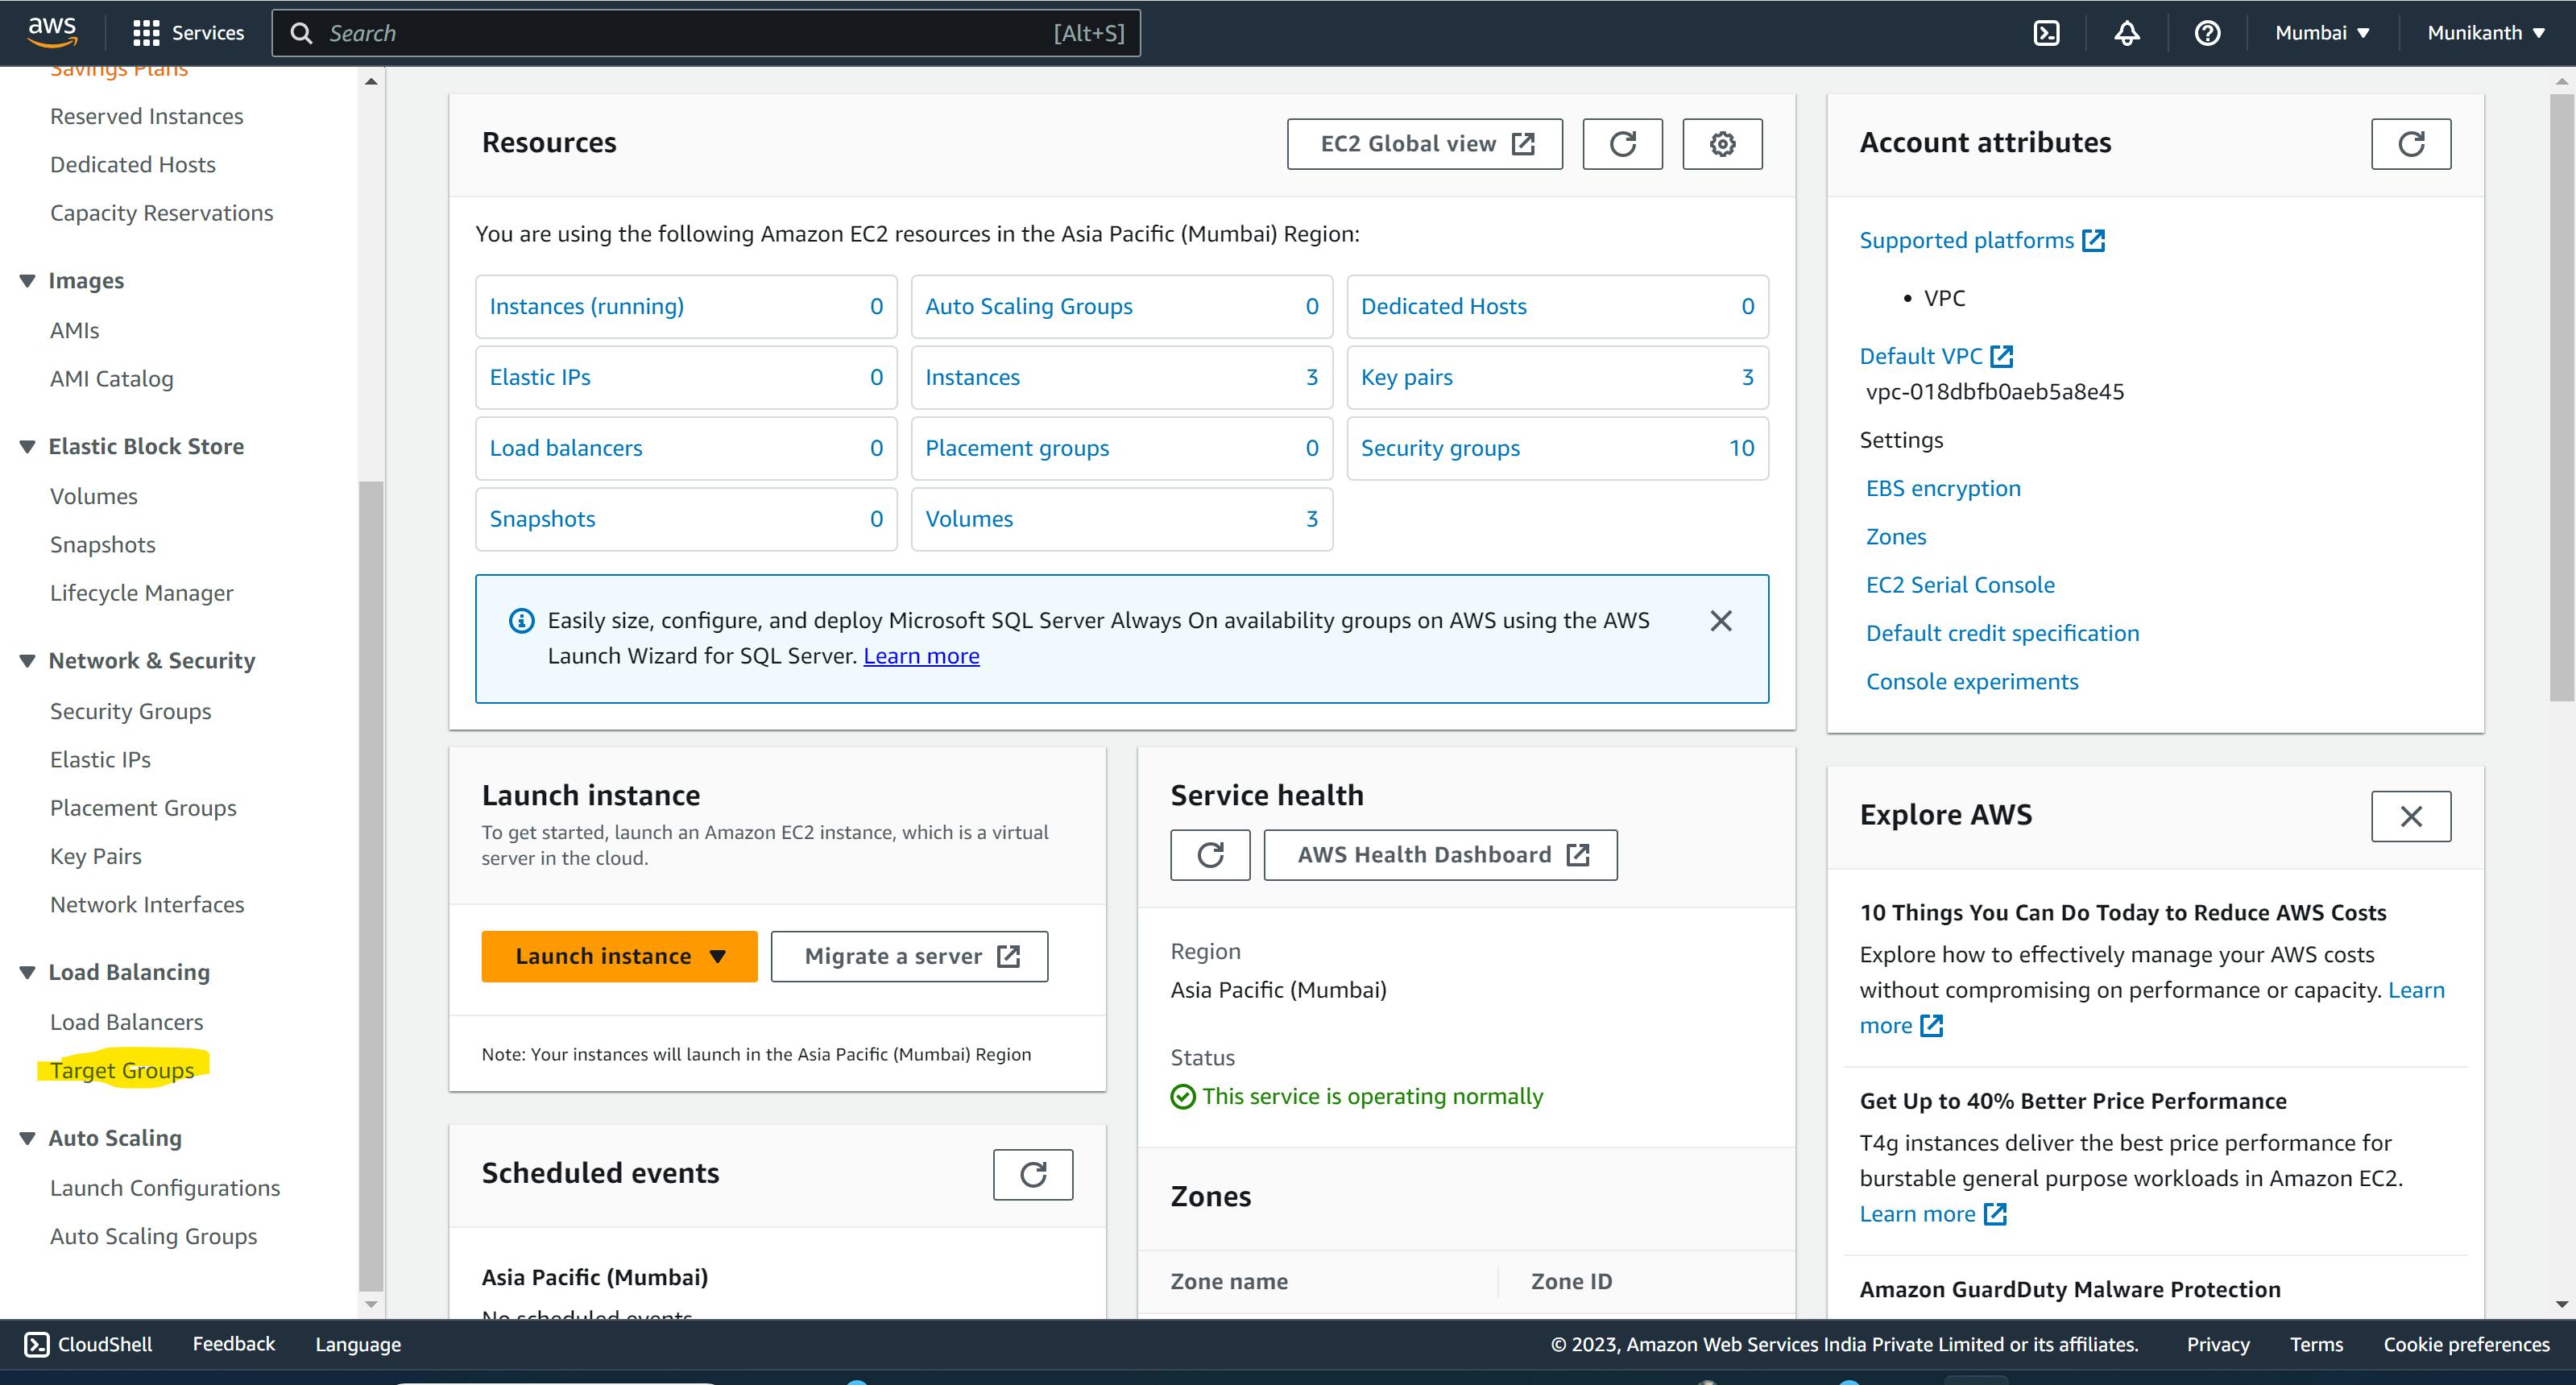
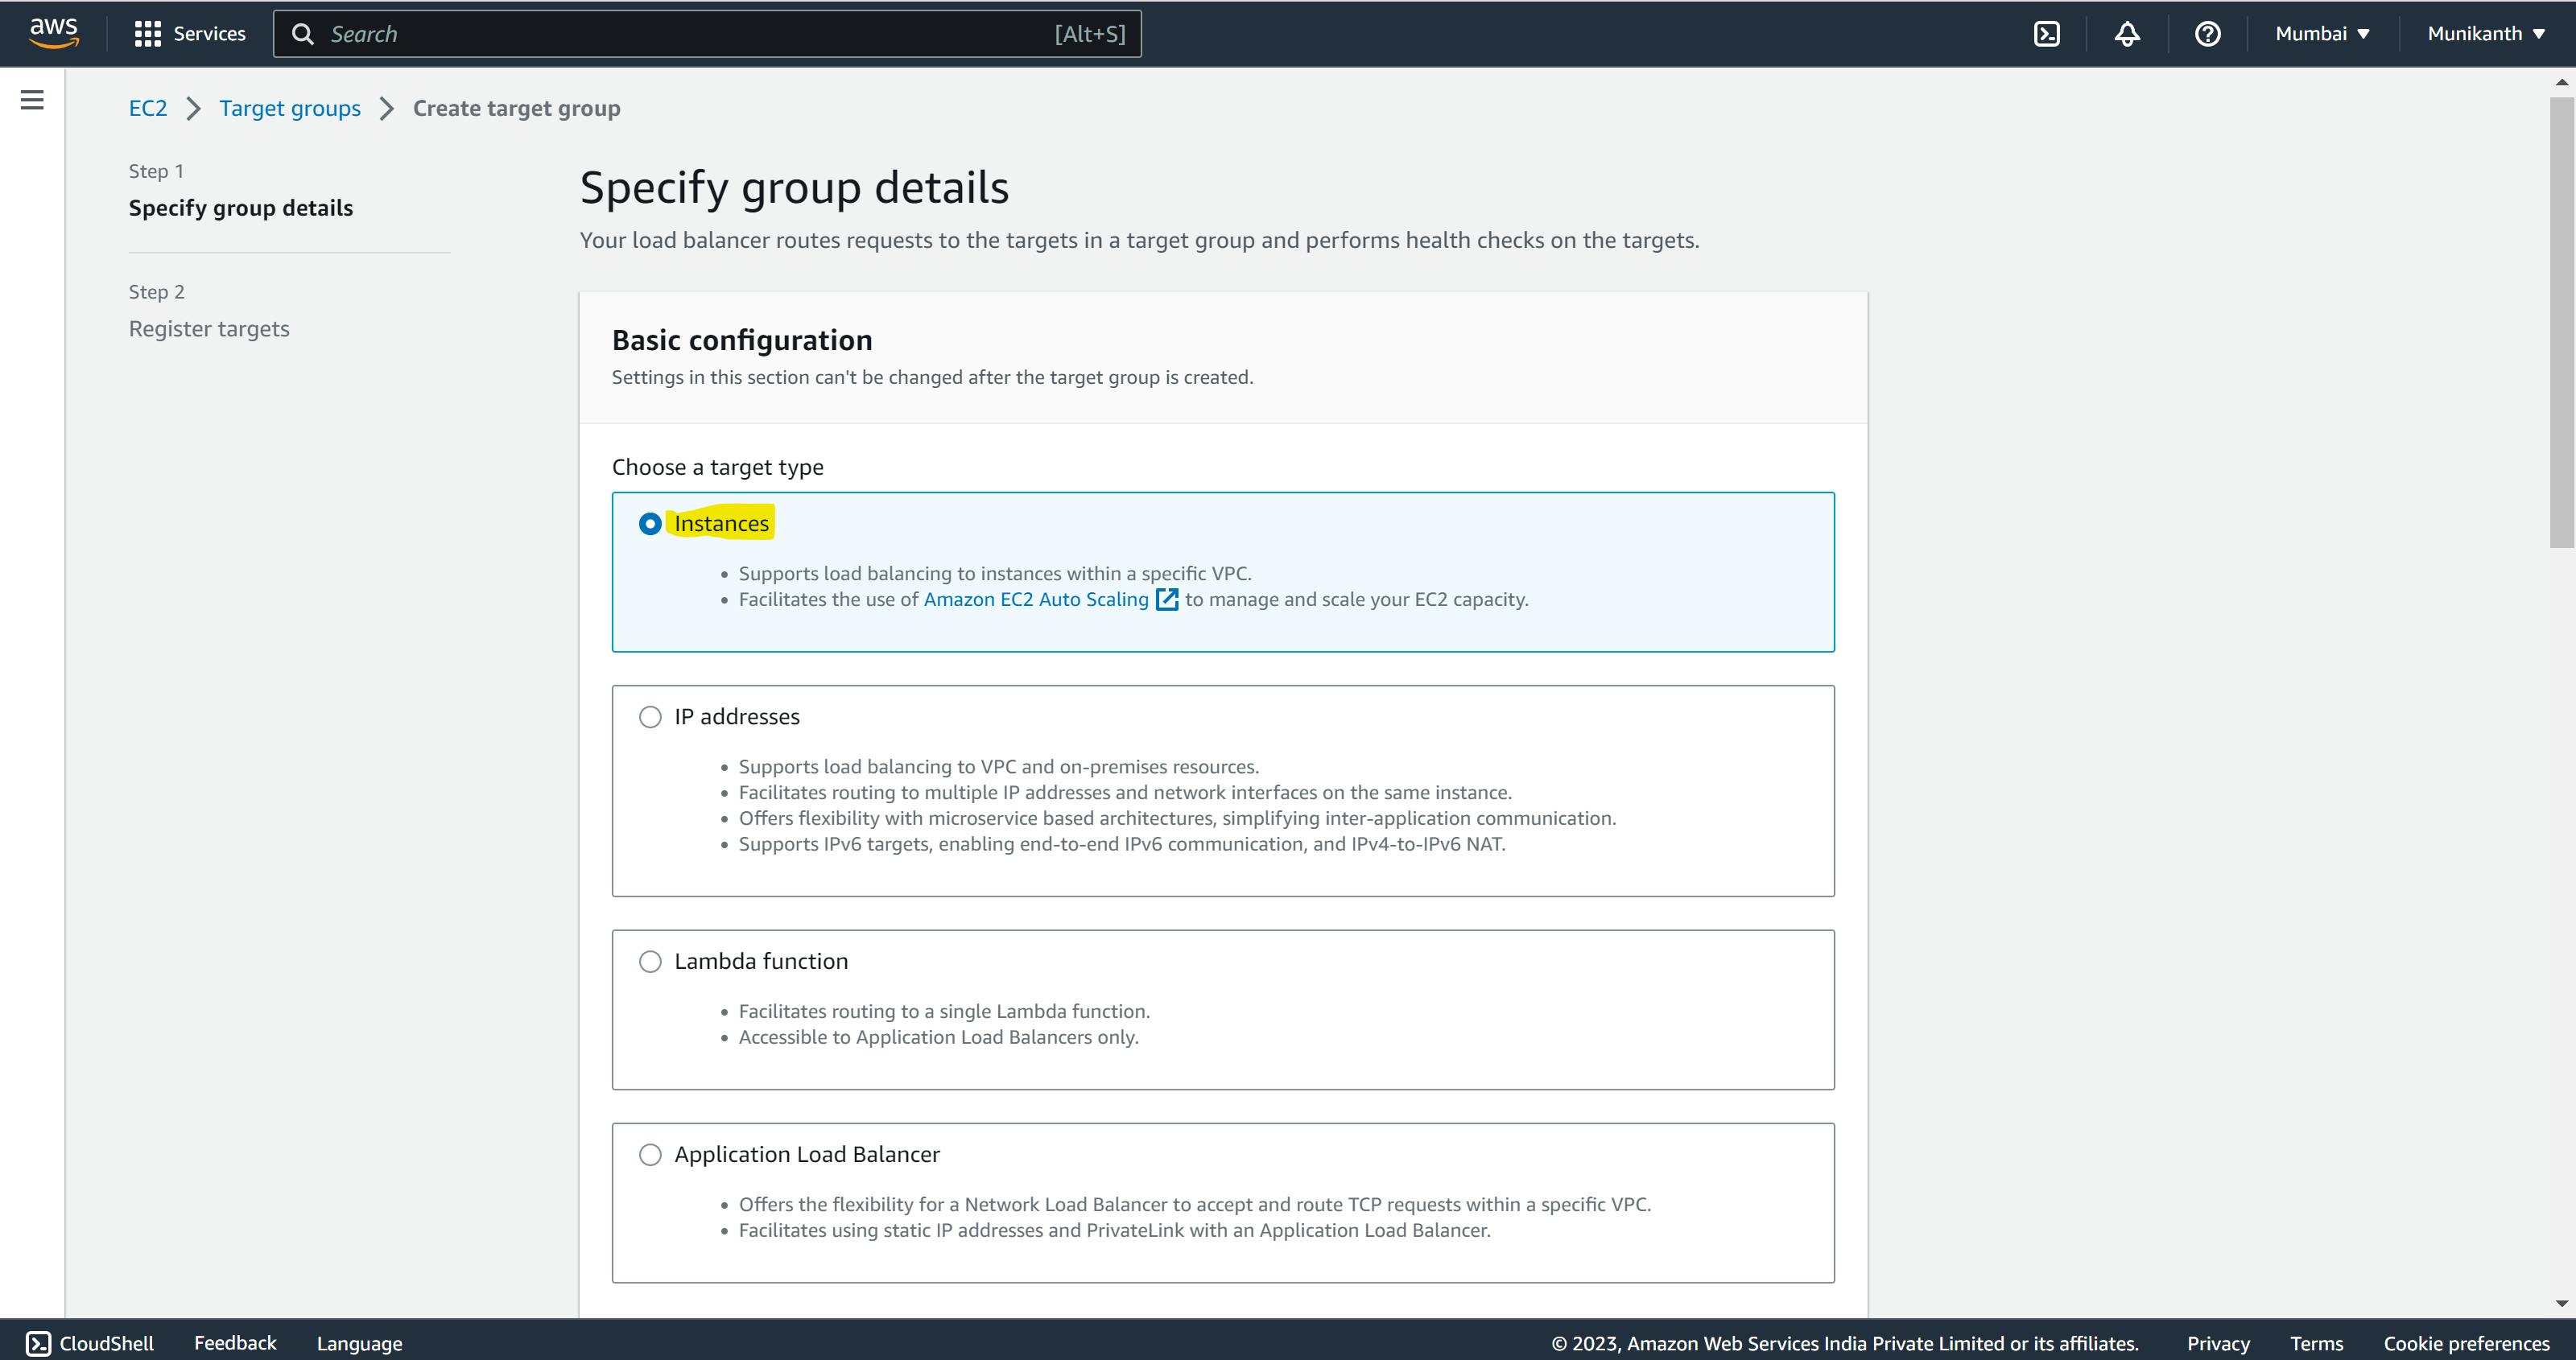
Step 4: Create a target group under the Loadbalancing section for the instances which you have created in the AWS Console.
Choose the target type as "instances" and name your target group.
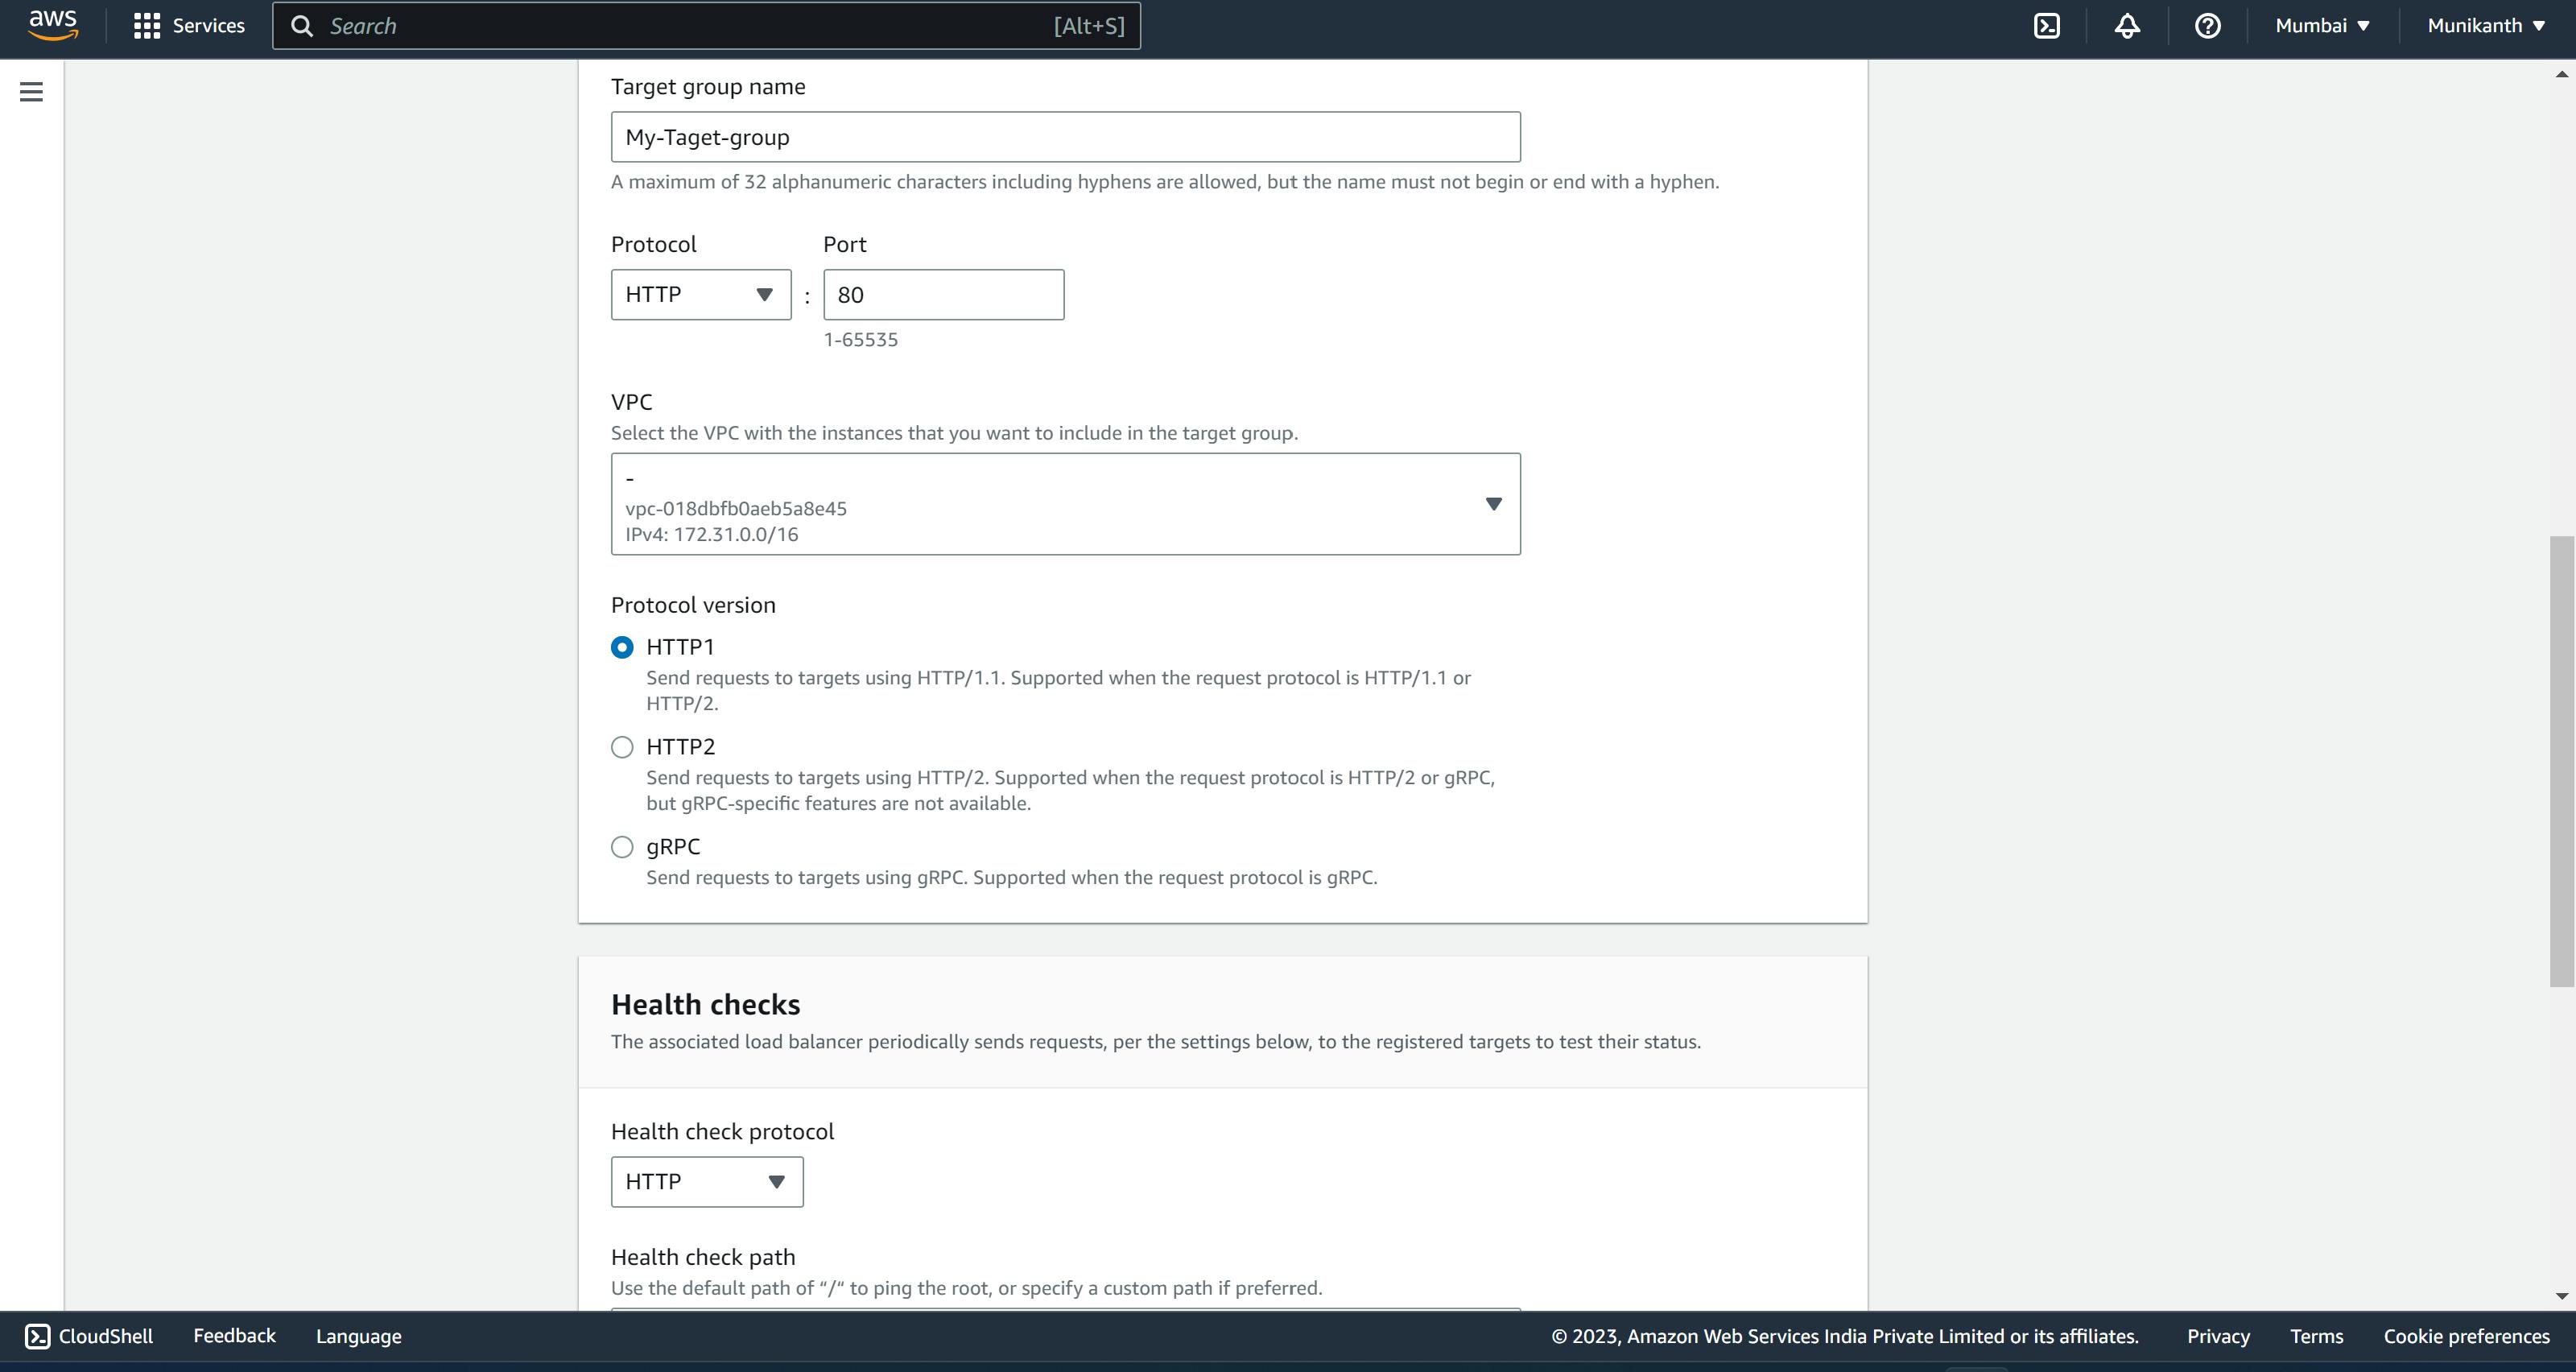
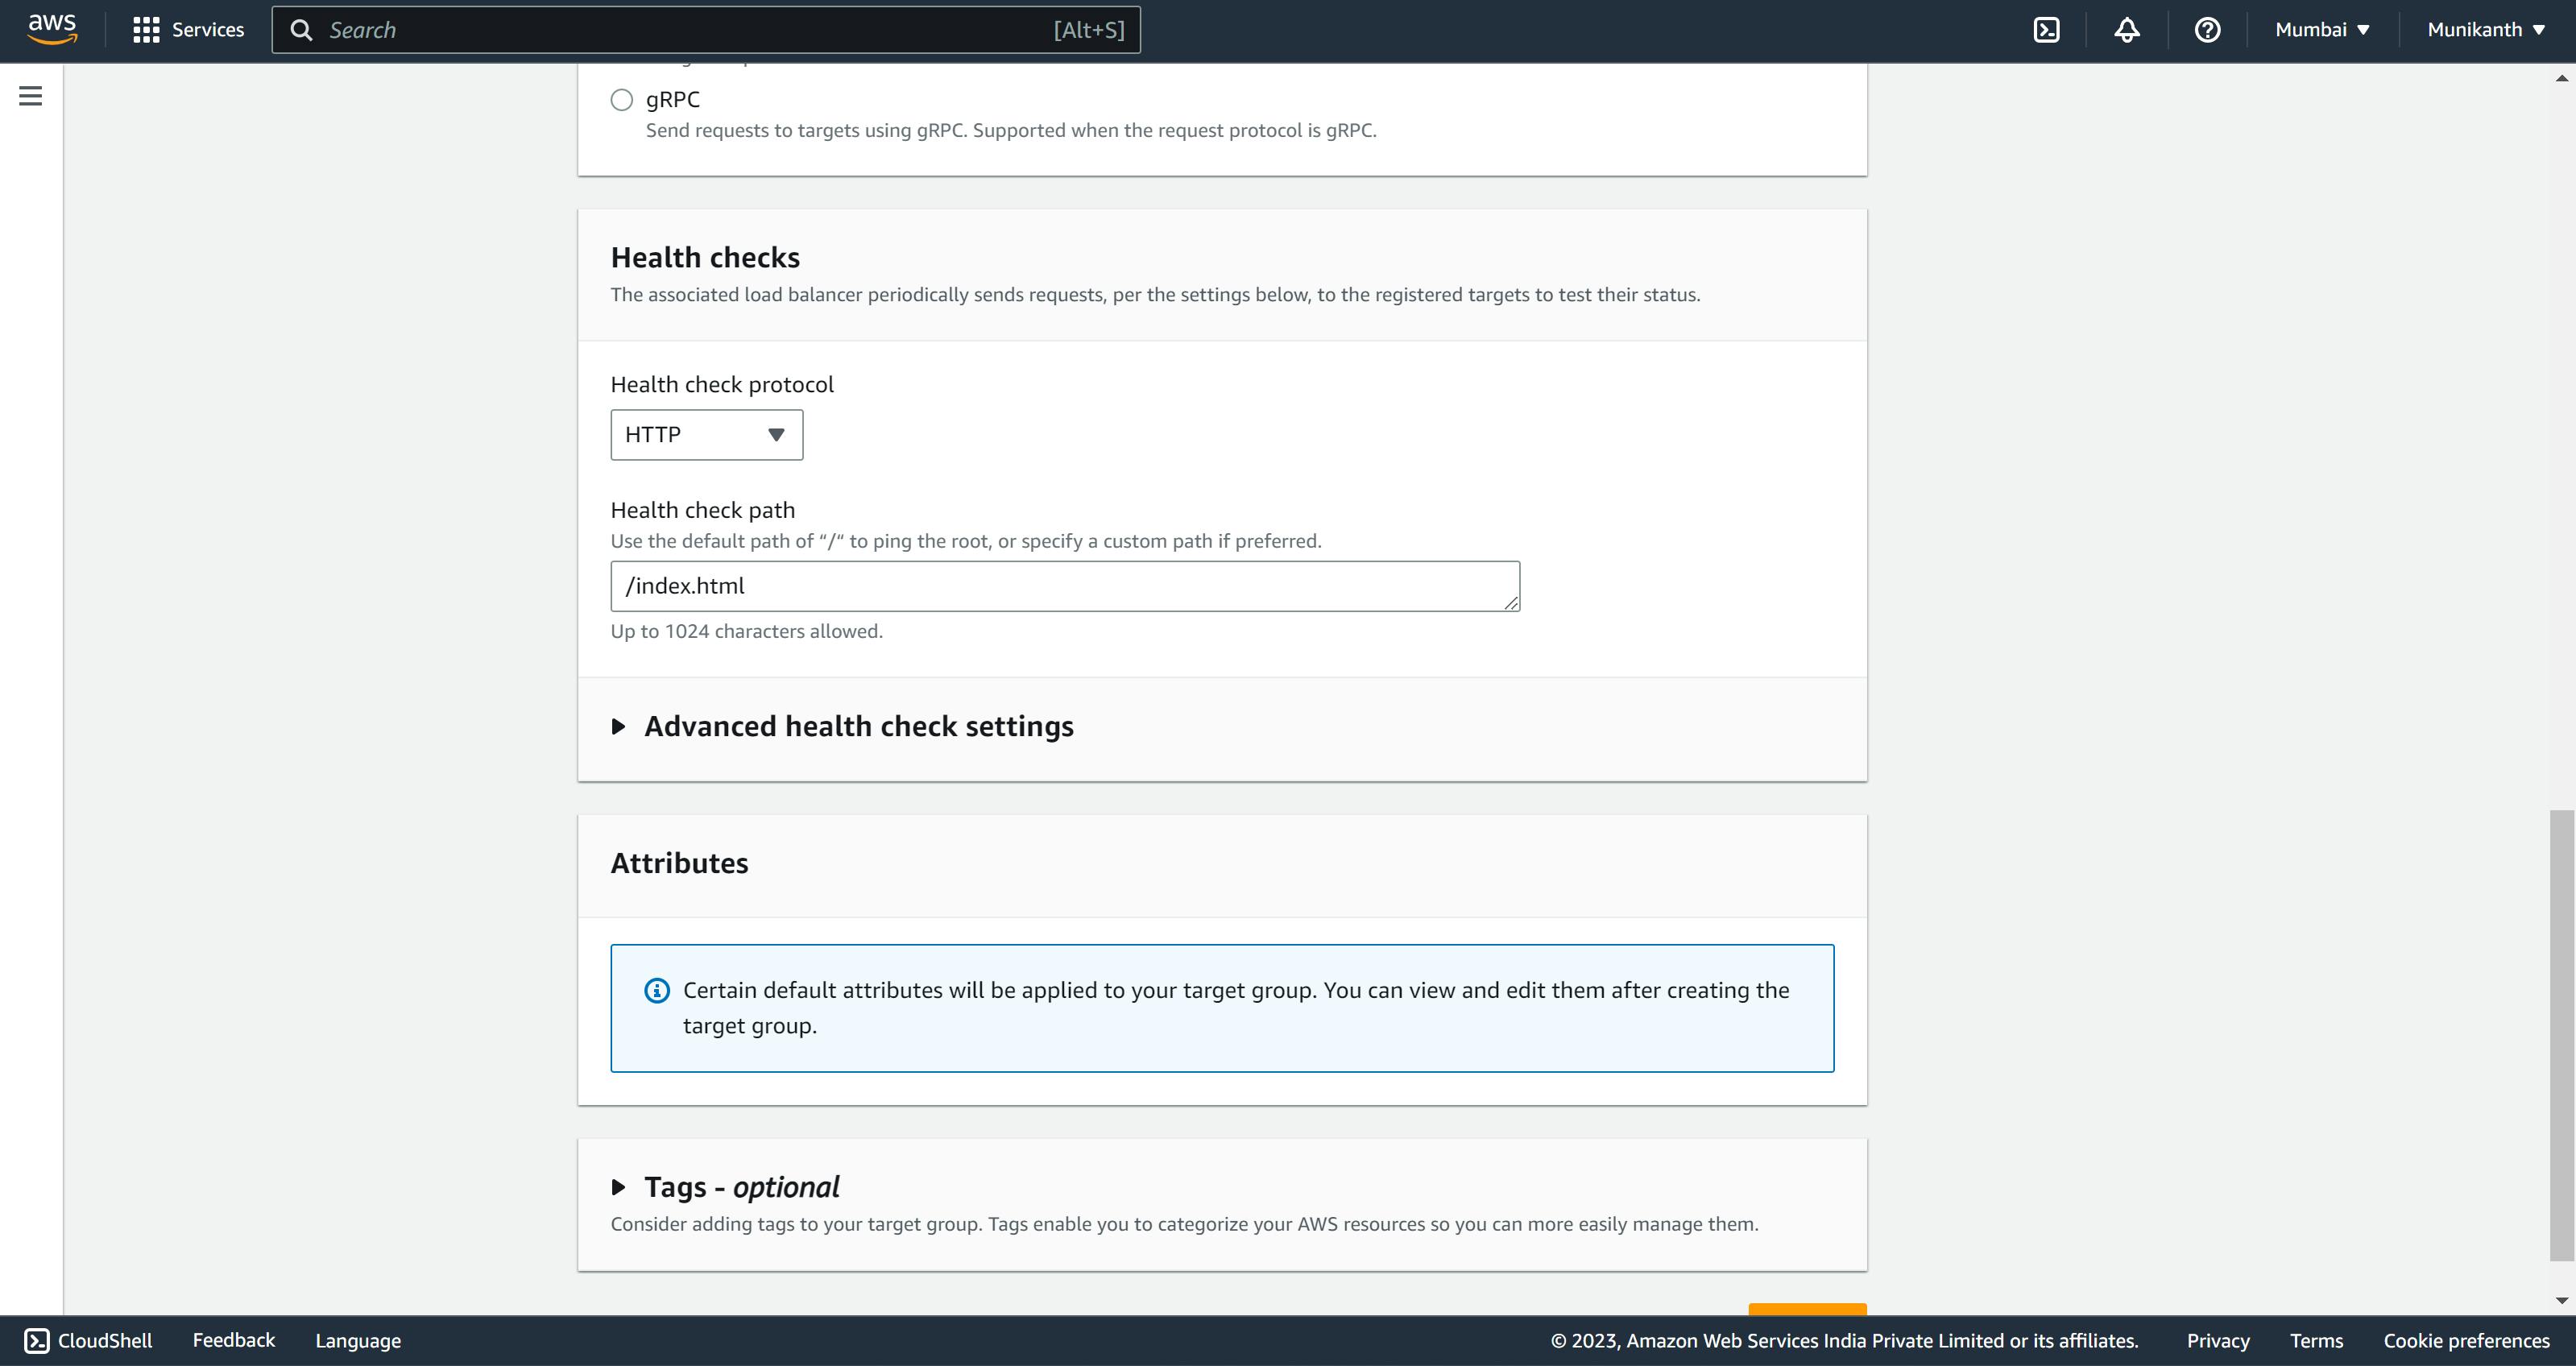
update the Health-check path as /index.html & other parameters leave as default & Click next.
Register targets section select your instances as shown below & proceed further

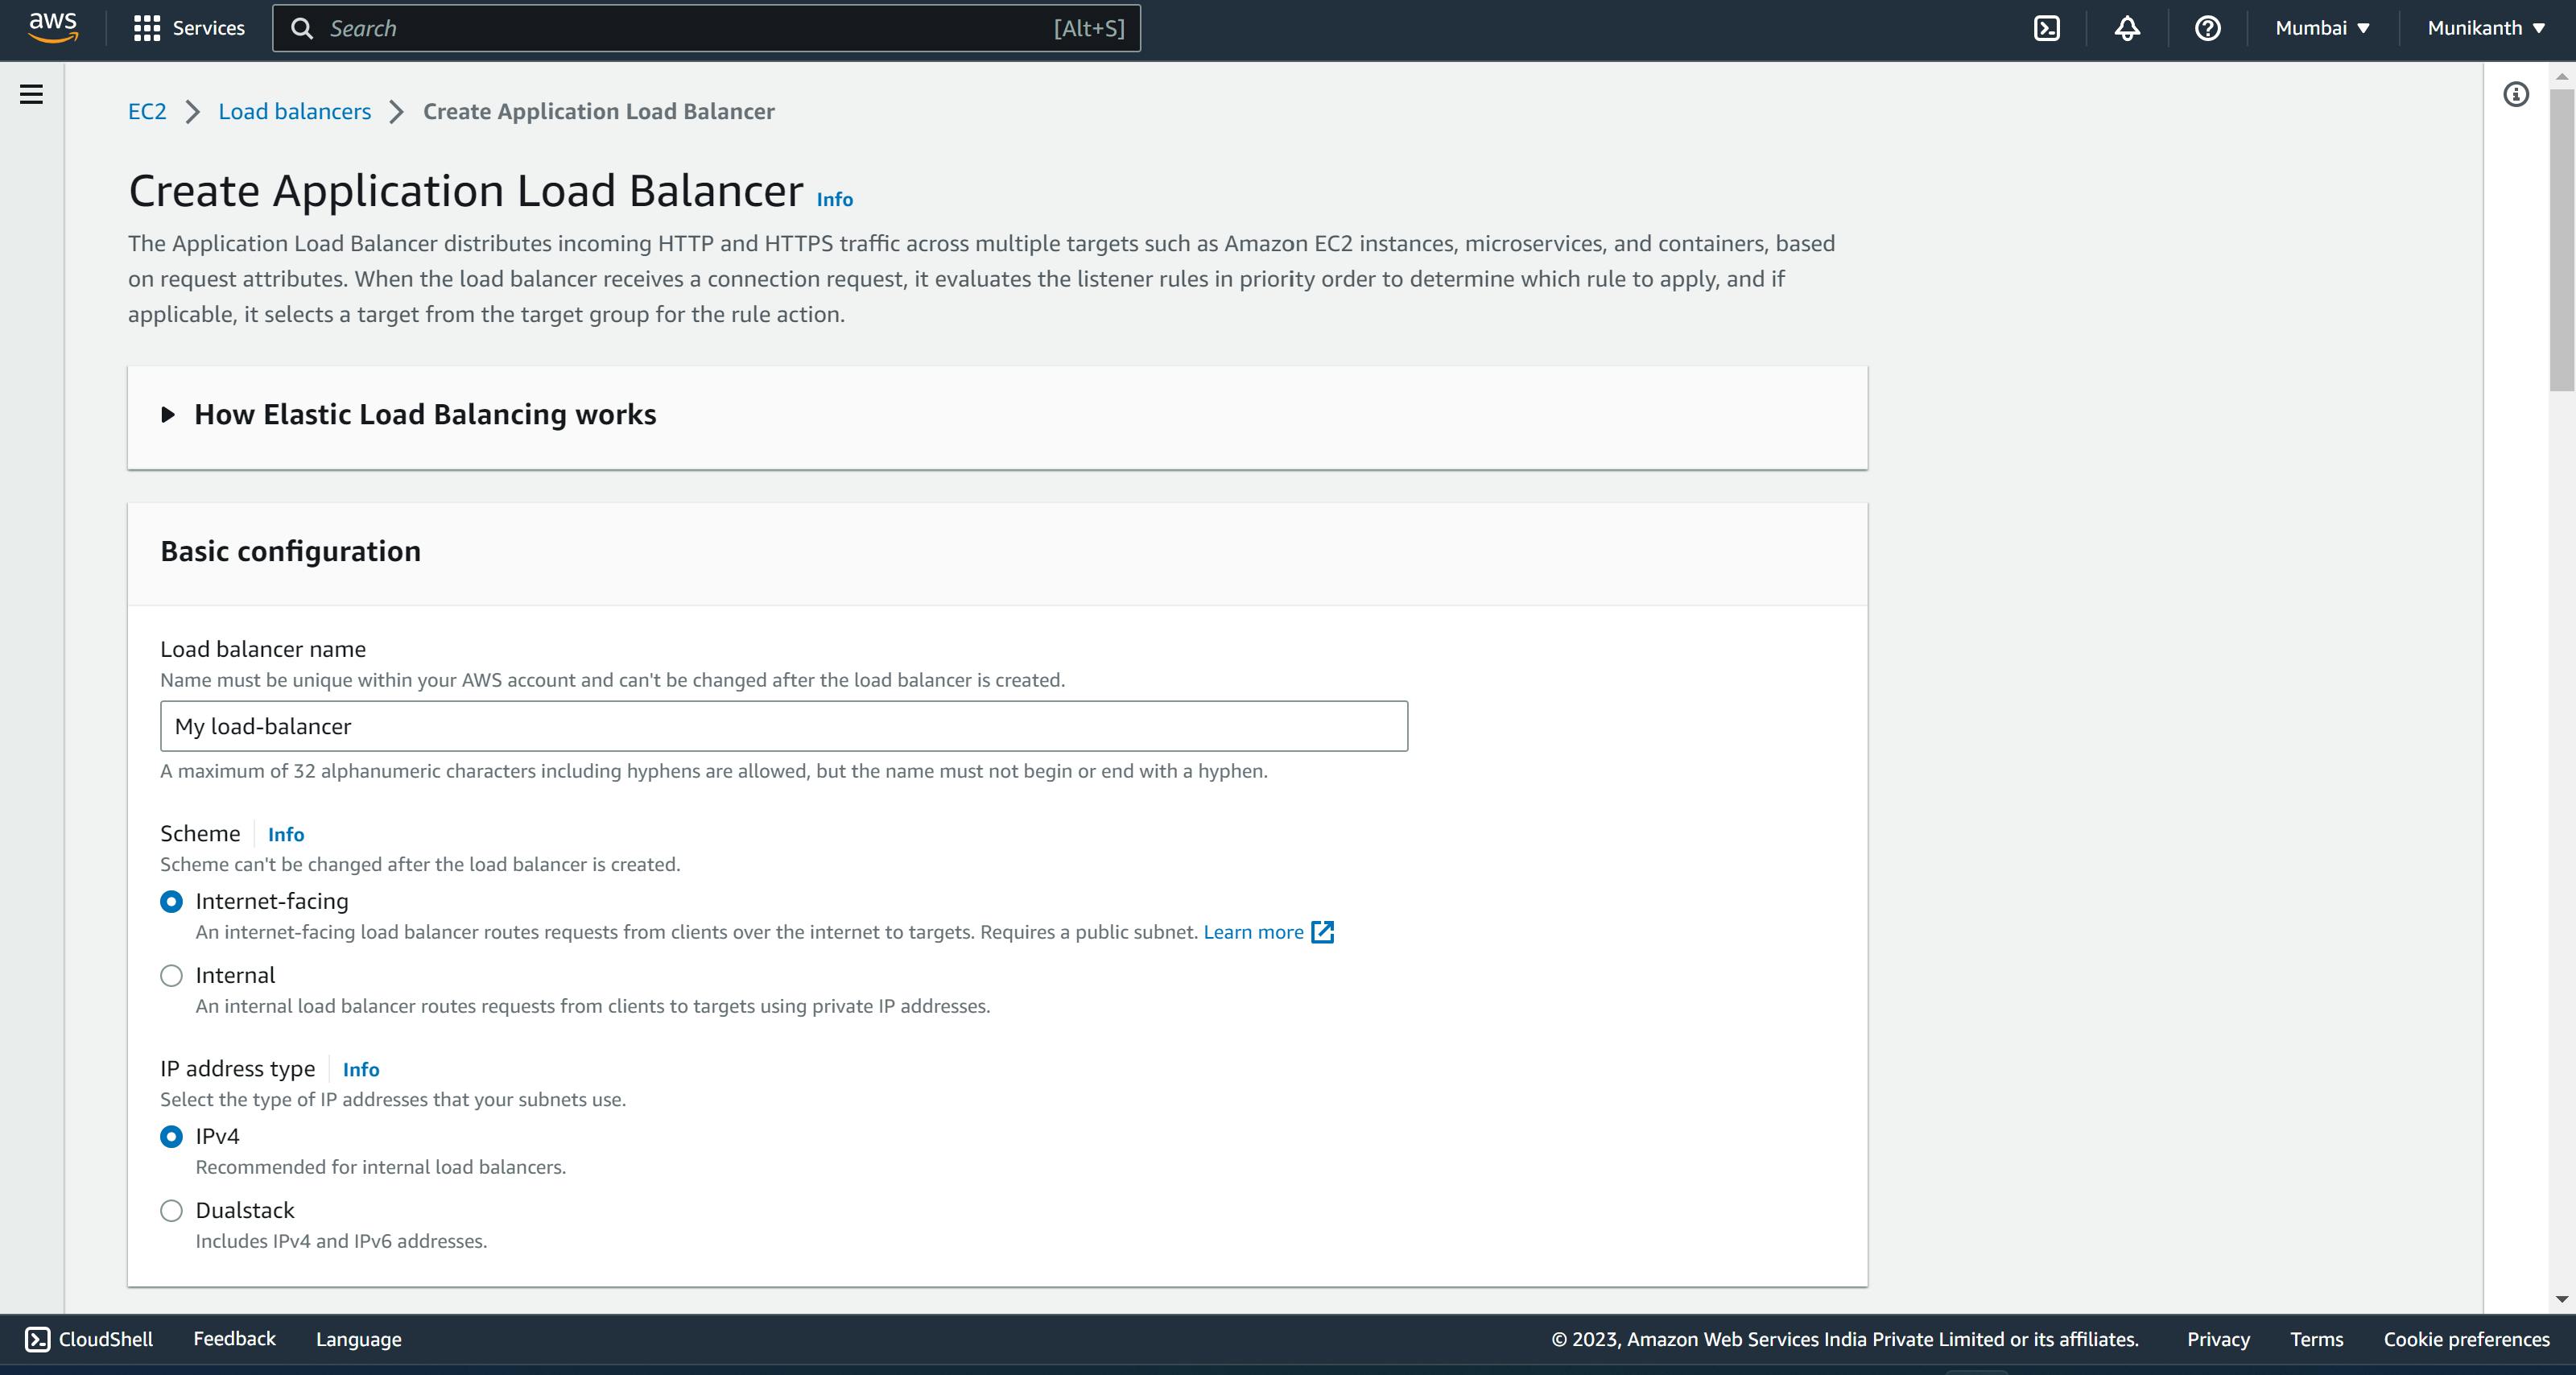
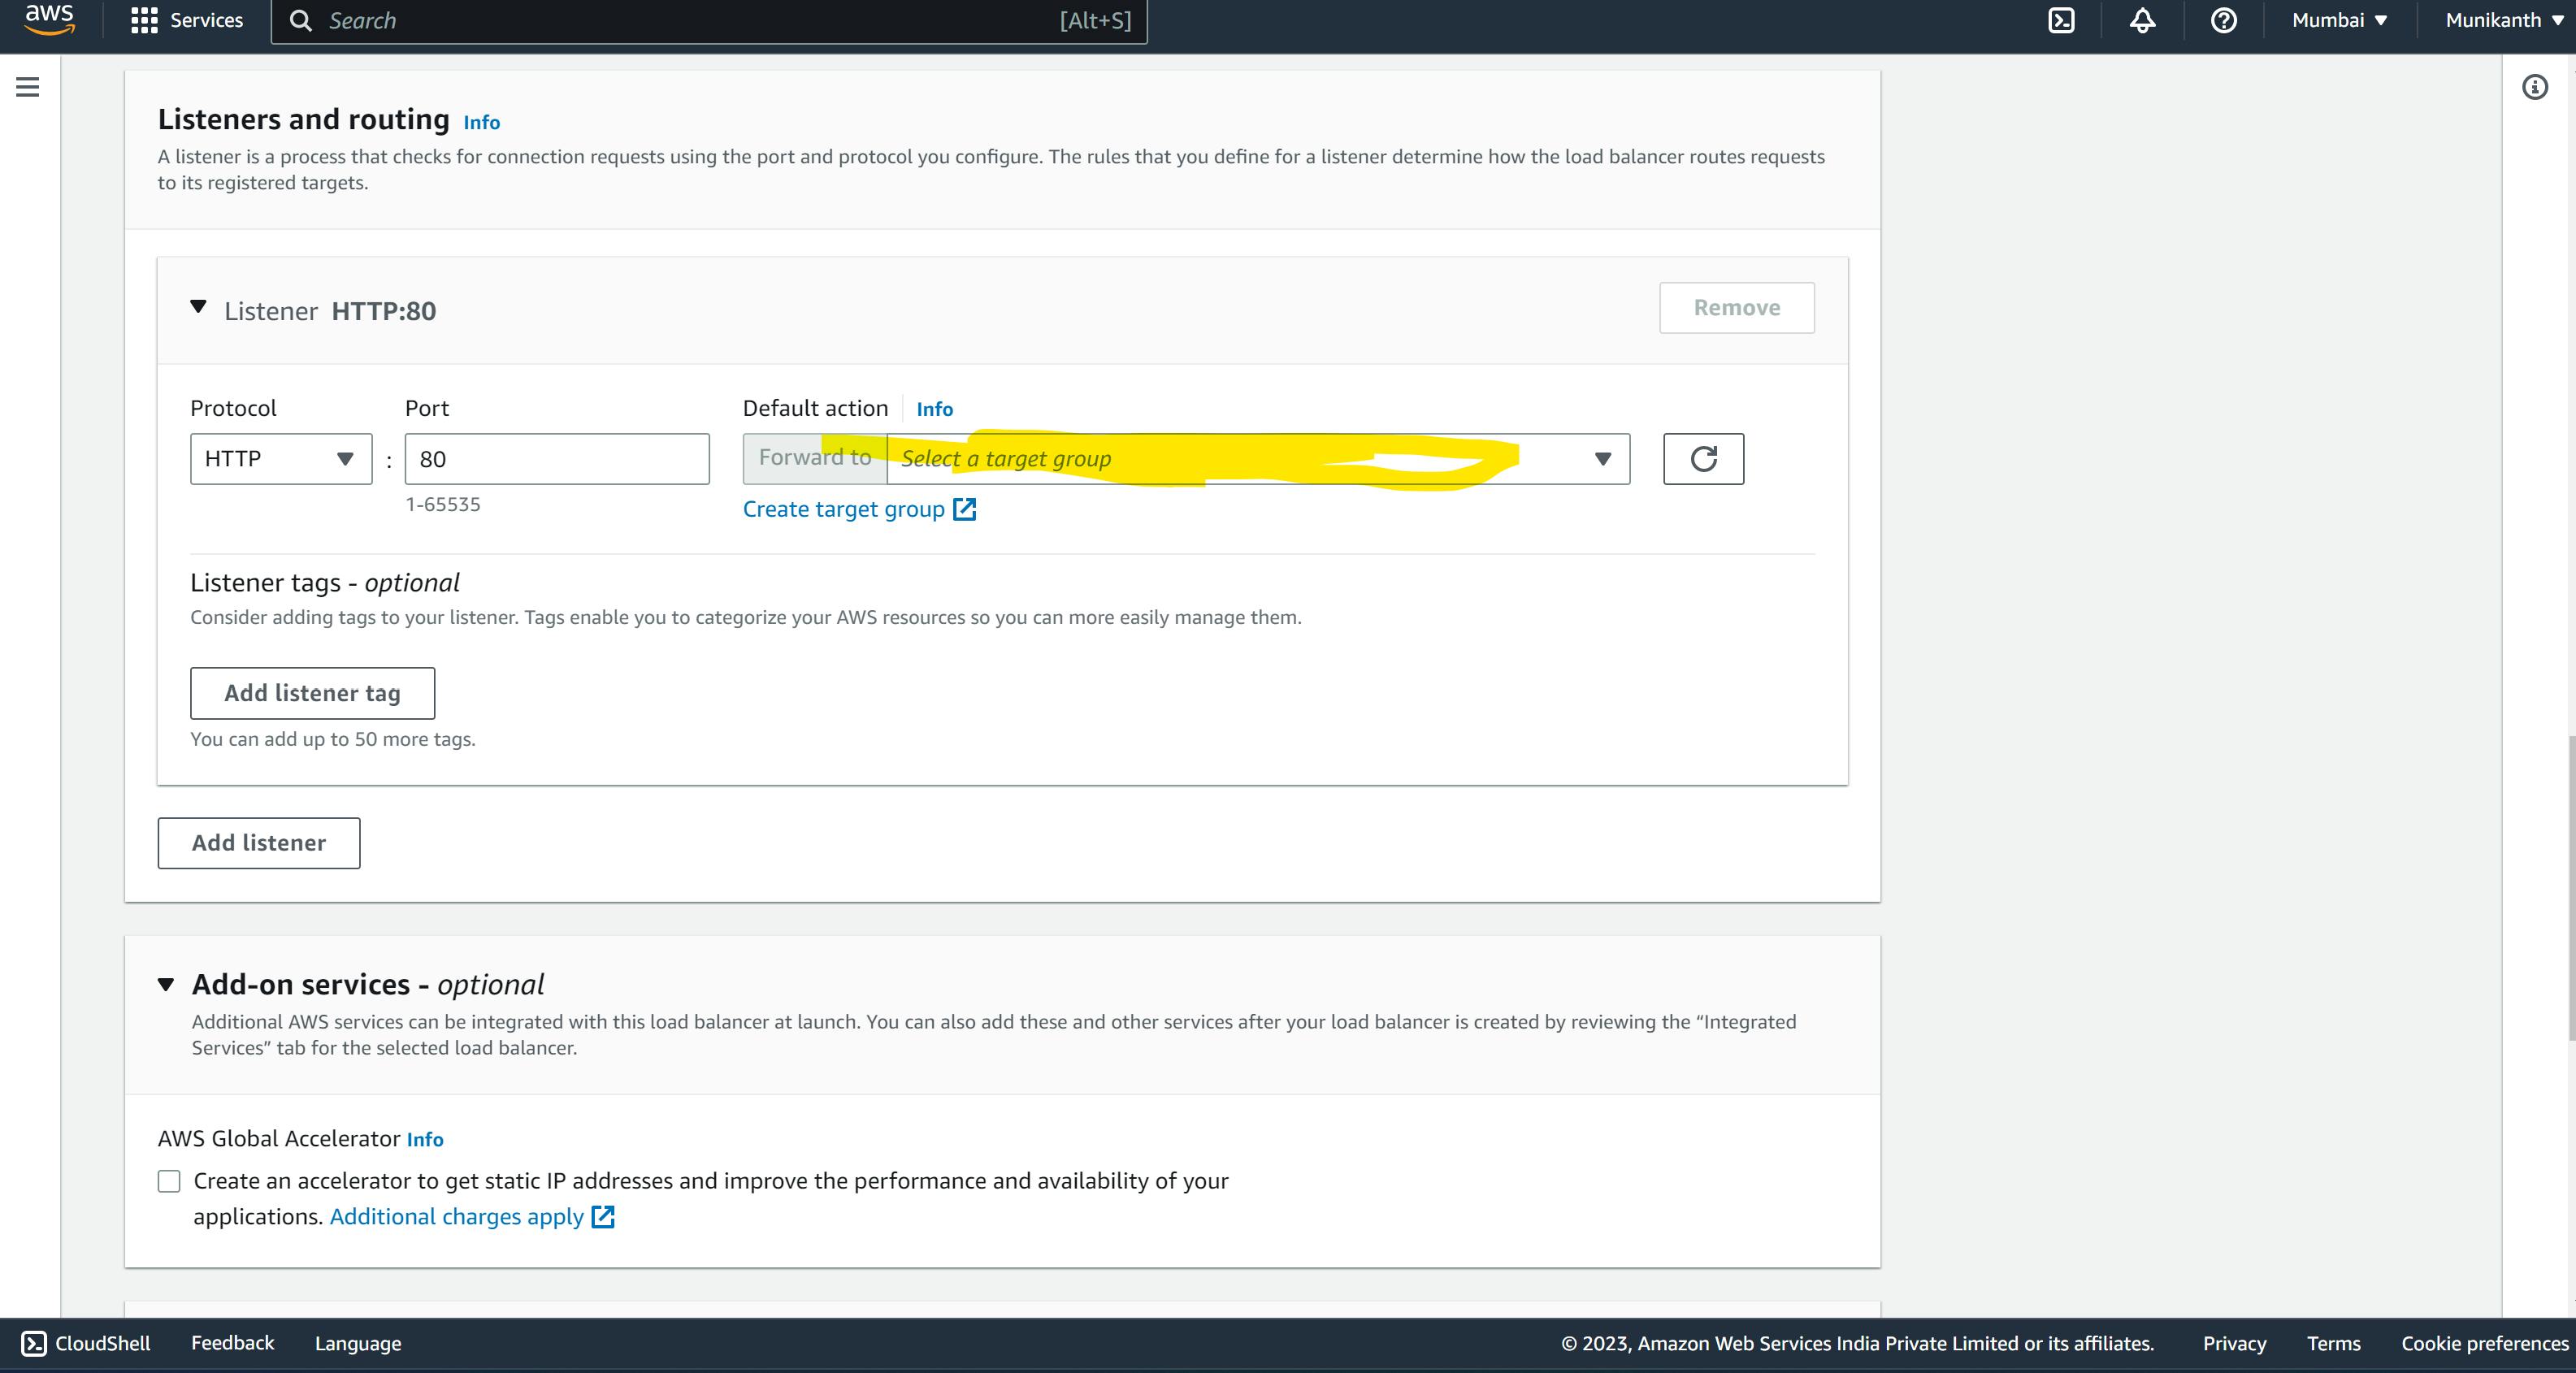
Step5: Create an application load balancer in the load balancer section name it
select the scheme as internet-facing & update it with the target group which you created in the previous step
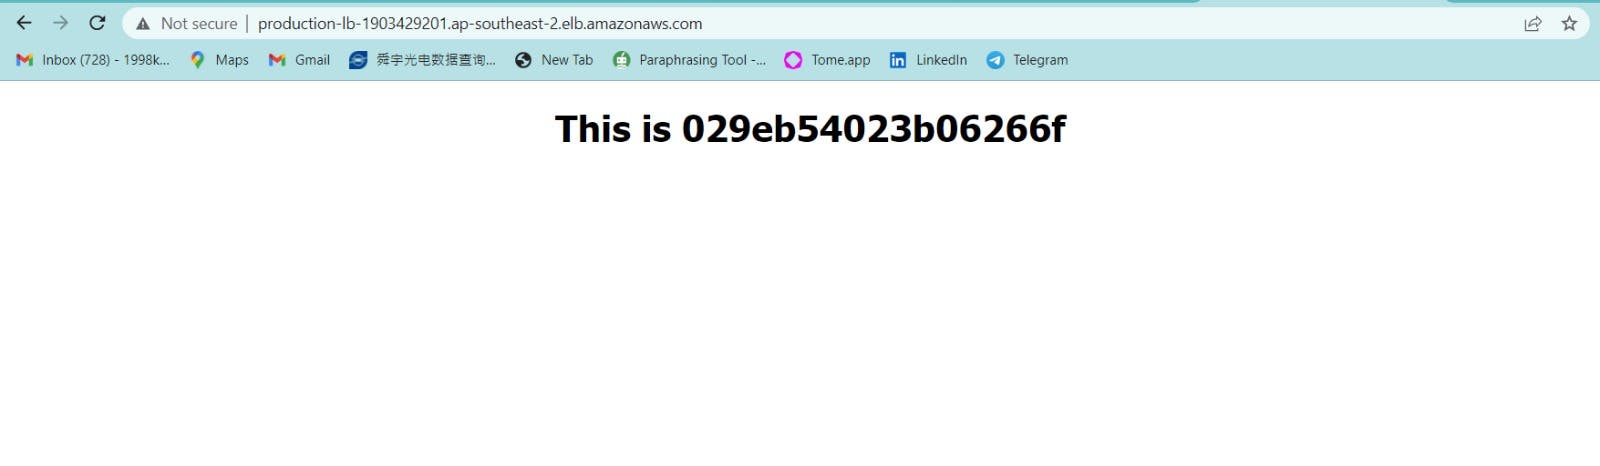
Step 6: Get the load-balancer DNS name open in the browser and try to access it. you will get a response like this, every time you send a request server redirects to a different server